Saturday, April 26, 2008

Baggie Tutorial

Okay, here are the pictures with step-by-step instructions

first cut your 12x12 cs to 8.5 x 12
score the cs at 2" and 6.5 inches the long way turn and 2 1/8 and 6 3/8
(remember you can always adjust the size to your needs)
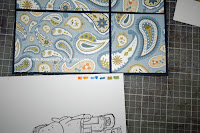
fold on the scored lines so it looks like this:
Enlarge this picture it is important to see were i marked the "x" and the "y". You will have to pick up the paper were the x is and fold it so it will match up with the mark "y" fold paper down. You will sort of create a triangle with your paper. Do this with all 4 "corners"
This is just an other view on how it will look when you fold: (ignore the dotted lines)
This is how it will look like once all 4 "corners" are folded to the mark "y"
you can use some sticky tape to attach the papers
Mark the center of the "mittle part" i will call it for now "tray" cause i do not know a word in english. You do NOT want to score at this point!! Just pinch it towards the INSIDE of you "tray"
(you will sort of create a "M" shape with your foldings) It will become clear once you start folding yourself.
Here ist the top view, see hwat i mean with the "M" shape?
This is how my "dummy" looks like:
The bag has plenty of space for candies or even a little toy. I am going to use mine for a kids birthday party.
You do not need to use expensive double sided CS simply use your wheels to wheel a pattern on the cs if you need to make more.
To hold the bag closed - you will need to create eigher a paper band or like i did a ribbon or you could even use your crop a dile to punch some holes and thread ribbon through. There are plenty of possibilities.
Do you like this project?
Thanks for looking
Claudia

Friday, April 25, 2008

Happy Birthday Step by Step Copics

Here is an other Magnolia Design Team card. I used last weeks sketch from Beate. I totally forgot to upload this card earlier. I thought the way you had to cut the paper looks great with the new Magnolia wall stamp.

All supplies for this card can be found at Magnolias online store. Except the patterend paper. I do not remember the name of this DP, i used up some scraps.

I had recently many questions regarding the Copic markers. I would like to show you how "I" start to color but i would like to stress that iam not certified and have no training. Many of the stampers here in the US take special Copic classes, on how to use these high end markers. So i do not know if this is all right on how i color. I think a good sorce to learn on how these markers can be used is also over at my Magnolia Design Team mate. She does an outstanding job with these markers.

Okay here it goes... i did not upload these pics very big but you can click on them and see the details. First i pick my markers to match my DP
I wanted to show you how great you can shade with these markers so i used greys and bowns to color my wall.
I used the lightest brown color E31 to just blend over all the colors
this is the complete colored wall. I did use later my blenderpen to lift some color off certain spots
This is how your backside should look like. If the CS is well saturated with ink you will have no streaks what you will usually have if you do use your waterbased markers.
Here are some pics with Edwin. First i colored with light blue his pants and added shades with a darker blue.
Than i blend over with a light blue again blending the 2 shades of blue. using later again the blender pen to add highlights.

Thursday, April 24, 2008

Alota Rubberstamps Design Team Member

My gosh i have some exciting news for you to share. A while back i have found these faboulous stamps called Alota.
I fell in love with these cute little girls and critters plus they have faboulous stamps that work fantastic with the Magnolias.Well.. when my stamps arrived i was shocked to see i ran out of EZ mount :-) Eventho my first order was not even mounted I went back to the site and ordered some more stamps .. can you tell.. they are addictive. Helene was very sweet with helping me when i had questions and shipping was super fast. You will need to take a look at the price too.. they are very good - one sheet of 10 rubber stamps costs only $20! Thats only $2 Dollars per stamp!!!
This set is called Kids

i was asked by Helene if i would like to be in her Design Team. I am absolute thrilled and of course i said "Yes"! Here are just a few stamps i ordered so far.
House
Window, there are fantastic landscape stamps to use with this stamp

And two of the bug stamps. This one is one of the Birthday line called "Bug in a Box".


Since today were 3 postings please do not forget to check out the work for Cute Card Thursday and the Trifold Pocket card all using the very new Magnolia Summer Collection stamps and Papers.

Missed

Today i have two cards posted. Here is a nice pocket card.

This card is for todays Cute Card Thursday challenge. Last week we had the callenge to create something masculine... today we "challenge" you to make a female card.

For my card i used all the yummy paper from Magnolia. These are the very new Daisy D Designer Paper series. These papers are double sides you are sure the patterns and colors match. The sewing machine was used to stich around each panel and i distressed the layers.
Everything is colored with Copics - even the sky, Stickles is used sparingly on the clouds and the girls wings.
Stamps: Magnolia new Summer 2008 collection stamps and Desinger Papers, Prima Flower
Sentiment: Retired SAB Stampin up "So Very"
Tools: Nestabilities and Cuttlebug for tag
I used this weeks Mojo Monday sketch for this card.

Just a note

Iam invited to be a Guest Designer for Arty Girlz Challenge blog on the 29.04. For this date i prepared this tutorial i was introduced by my Demo.

Well, yesterday the same tutorial went online over at SCS - so Julie and I decided to just go aheand and post it here and i will create something new for The Arty Girlz blog.

Designer Paper is Daisy D and Prima Flower can also be found at Magnolia's online store.
Ribbon, Sentiments, Label punch and the swirl on the label is a Stampin up product

Supplies needed:
you can make this card with simple household items.
plate or circle cutter that cuts a circle 8 1/2 across
- ruler
- 'swiffel' cutting blade
- one sheet of 12x12 double sided Designer Paper
- 2 sheets of coordinating CS

the next 2 pictures are showing you to ways to score your paper. one easy way is to use your scoring tool. if you do not own a scoring board, you can use your grid paper to score your circle at 3 1/2. fold in.


rotate your circle piece and score at 2 1/8 and 6 3/8
if you did not use the 8 1/2 diameter circle you can simply mark the center of your circle on the long side and fold your left and right tips of your paper to this center point. the given measurements are just making it easier for you so you do not need to calculate but you can make this card with any size circle.


Cut out the 'triangles' on each side to reduce the bulk. You can see this on the picture
To make the tag of your pocket card
cut one sheet of CS to 4 1/8 x 4 1/4 as mat and use the second color on top
embellish
My copics i used to color Tilda
Today i would love to reccomend Hannes fabulous inspiring Blog!!!

Wednesday, April 23, 2008

You Are The Greatest

Today's card is a bit more work than the card from yesterday. But i wanted to show you how nice the Magnolias are no matter how much time you can put into making a card that day. For this card i did not use a sketch - i was so inspired by the beautiful Designer Paper Magnolia sent to me. Since the line is called "Shabby Chic" i thought i give my sewing machine a second chance after sewing i distressed every layer of my card with Tim Holz Tonic distresser. This card is all watercolored.
All supplies as stamps, trim, flowers, Designer Paper and CS (except the hardware) can be found at Magnolia's online store.

Tuesday, April 22, 2008

Love Ya Bunches

So glad i did not sell my "Monkey Business" set :-) the sentiment fit perfect to the new line of Daisy D Designer Paper. Card was made using Maria's sketch (see below) Tilda is this time colored with Prismacolor pencils and OMS.
Heart Embellishment is "Doodlebug".
Tools: SU: Paperpiercing tool, Photo corner punch, Nestabilities